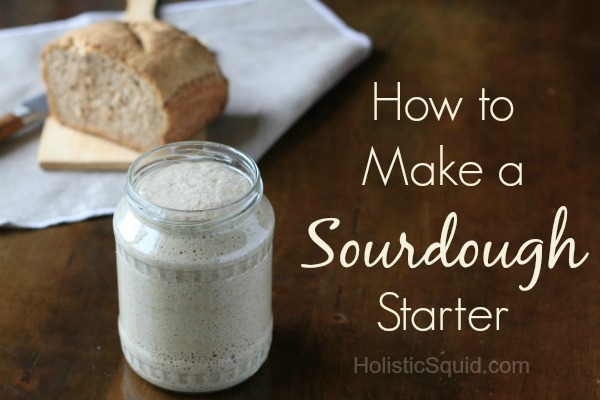
[I'm super excited to share this post in our series about sourdough. Naomi makes learning how to make sourdough starter looks so simple, even to my baker-challenged self!]
In my last post we chatted about why traditional sourdough may actually be good for you. I loved hearing stories in the comments about how sourdough bread was one of the few foods those with health issues could tolerate.
I had wanted to make sourdough bread for years before I actually did. Sourdough seemed like this super complicated and finicky process that only expert bakers could attempt. But once I was walked through it step-by-step, I saw how simple it actually is. All it takes is flour, water, and time.
Even though making a sourdough starter takes a few days, it takes very little active time. After a while, looking after the starter and baking with it will become a habit. It may take a few attempts to get it right, but the effort is well worth it, both for the health benefits and the taste.
For now we'll learn how to make a sourdough starter, but stay tuned for more recipes, including pancakes, muffins, and others. All the recipes will be made with the flour subjected to a long, slow fermentation (as opposed to just adding starter to flour and baking it right away) for all the beneficial effects of sourdough.
What is a sourdough starter and why do I need one?
A starter, or levain, is a mixture of flour and water that proliferates yeast and lactobacilli over time. These microorganisms feed on the flour, producing ethanol, various acids, and carbon dioxide.
The carbon dioxide is what make the bubbles in the dough and causes it to rise. After a starter is established, we add it to our bread dough (or whatever else we are making) to ferment the dough as the yeast and bacteria continue to predigest the flour.
What kind of flour should I use?
You can make your starter with almost any kind of grain flour, although gluten free flours are a little more tricky. I've had the best results with rye. But feel free to use all purpose wheat, spelt, rye, or whatever you have handy.
If you are so lucky as to have access to freshly ground flour, that's even better, but it works out fine with pre-ground flour too.
What about water?
Tap water is not really that clean, unfortunately. Seeing as chlorine and chloramines kill microorganisms, you'll want to avoid that when trying to develop a starter. Filtered water is best (here are the best ways) or, in a pinch, boil and cool the water or leave a jug of water sitting out overnight, though this doesn't get rid of chloramines.
Time and temperature
The length of time it will take to see activity in your starter depends partially on the temperature.
Sourdough starters perform optimally at room temperatures, between 68F – 77F (20-25 C). The warmer the temperature, the faster the microorganisms act. If the temperature is on the cooler side, it can take longer for the starter to be active.
How to make a sourdough starter
Step 1: Start your starter
In a non-reactive container (glass or ceramic), mix 80g (1/3 cup) water and 60g (1/2 cup) flour. You want the mixture to be thick but stir-able. Mix well with a wooden spoon or whisk – lots of air mixed in is a good thing.
Scrape down the sides to prevent mold. Cover the container so air can exchange but bugs are left out, I usually secure a piece of cloth with a rubber band. Leave in a warm place, 68-77F (20-25C) is ideal.
Step 2: Feed your starter
Every twelve hours repeat adding 80g (1/3 cup) water and 60g (1/2 cup) flour, stirring well, scraping down the sides, covering, and leaving in a warm place.
Depending on the size of the jar, you will need to discard some starter before adding new flour. Do not let the starter equal more than half of the size of the container, otherwise it will overflow.
I know it's painful to compost what you're working so hard for (and recipes will be coming on how you can use that excess starter), but the more starter you have, the more food it needs; a 1/2 cup of flour will not be enough for a 12 hr period if there is too much starter.
The first day, it may look like nothing is happening or you may see a bubble or two. The second day should have a couple bubbles. Day three or four it will probably smell awful – you may think you are doing something wrong and that it has gone bad.
Do not despair, but carry on! As the starter continues to mature, the smell will improve. A good sourdough smells sour and yeasty.
Step 3: Use and maintain your starter
The sourdough starter is ready when it doubles in size and is filled with bubbles. This may take anywhere from five to eight days.
If you use your sourdough often, you can leave it on the counter and feed it twice a day. If you use it less frequently, you can store it in the fridge and feed it once a week.
When you want to bake, take the sourdough out and feed it, let it rest for 12 hrs, and then continue with the recipe. Many recipes call for 100% hydration starter, which means that it has equal parts (in weight) of flour and water. To achieve this, simply feed the starter equal weights of flour and water, for example 60g (1/4 cup) water and 60g (1/2 cup) flour.
Troubleshooting your sourdough starter
- If you get a layer of dark liquid on top of your starter, called hooch, it means that your starter has run out of food. It may be because you waited too long, the temperature is so warm that the mircoorganisms are very active, or that the starter has too much water. Simply pour it off and continue.
- If you get blue or black fuzzy mold, sorry–dump and start over. The roots of the mold go into the dough and mold is not the kind of microorganism we want to proliferate.
If making a sourdough starter still seem overwhelming to you, take courage! Start with step one, and if you have any questions, ask them here and I'll help.
What would you like to make with your sourdough starter?
Now that you have a sourdough starter, you can make Sourdough Pancakes and Sourdough Lemon Poppy Seed Muffins!
The closest Naomi has gotten to her dream farm is growing live bacteria in jars and wrangling her four children, including twins. A Canadian who now lives in Slovakia, Naomi writes about traditions, food, and life in Slovakia (as well as some pretty strange food) at Almost Bananas.


Can you clarify this?
“When you want to bake, take the sourdough out and feed it, let it rest for 12 hrs, and then continue with the recipe”
That is for when you have a sourdough sitting in the fridge, alive but no longer active. Take the sourdough out of the fridge, feed it with 60-80g water and 60g flour and let it sit for 12 hours, in which time it will become active and bubbly. After that, you can follow the bread recipe. It’s particularly important for bread, when all the rising is due only to the action of the sourdough, and less important for recipes like muffins or pancakes that have another rising agent.
Thanks for the recipe! Looking forward to starting tomorrow!( pun intended)
When you say that half a cup of flour is not enough to feed the starter for 12 h are you saying we should ‘compost’ some of it? How much?
Is it necessary to change the container each time?
Half a cup of flour is enough to feed the starter for 12 hrs for the first couple days. If you get rid of some you can compost it, although I prefer to use it to make recipes that don’t depend on the rising power of the starter, like muffins or pancakes. I’ve changed how much starter I keep going. If you use it a lot, keep a bigger jar (I’ve got mine in a 2 litre jar right now), if you won’t use it as much, keep a smaller amount (I’ve used a mason jar before).
You don’t need to change the container each time, only if you are having a particular problem with mold.
If you have the chance to listen, this is really great info on why grinding our own organic wheat can make a tremendous difference over commercially milled wheat. She also does a great job refuting all the false info in Wheat Belly. http://www.breadbeckers.com/store/pc/the-truth-about-wheat-cd-free–limit-1-per-order-45p3370.htm?atc=1&idproduct=3370
It would be super helpful if you added a printable simplified set of instructions, kind of like a recipe card that I can I have on the counter when I try this. 🙂
Hi! I was just wondering what you would recommend me use to hold my sourdough starter. I know it grows and I don’t want it to get so big that I’m constantly putting it in a bigger jar. Plastic or Glass? Wide mouth I’m guessing?
I recommend glass, definitely wide mouth. My favourite glass for sourdough is actually a storage jar, it’s wide and fat.
Will you be showing us how to make traditional loaves with sourdough too? I’m just getting back into making our own bread again and can’t find the recipe I used before ???? When I went looking online I was overwhelmed by the variations in suggestions for every step of the process!
How much sourdough starter should you discard before putting in more flour?
Leave about a 1/2 cup before adding more flour.
We used to pass around Amish Friendship bread starter at church to keep it going. Might I suggest that when it’s time to ‘compost’ some of this starter that you might want to share it with family, friends, neighbors, etc? Let’s spread some healthy/tasty around! lol Even print out the instructions above and a few good recipes to give with the shared starter.
I would love recipes for sourdough pan loaf and cinnamon rolls. Thanks!
I am on day 4 and I am not seeing too many bubbles (although the smell is strong!). I wasn’t very clear on your instructions above, is it absolutely necessary to discard each day before feeding or not? I’m just wondering could this be why I am not seeing many bubbles yet? And, can I use the discard in other recipes even if it hasn’t bubbled up yet?
I’m just following up as I did not have success here and was hoping you could help me troubleshoot. I used fresh milled organic rye flour. My starter was VERY thick (thicker than any starter I’ve done in the past) and it did not create bubbles at all. I’m just wondering if you have any suggestions as to what could have went wrong here. I ended up trying to reduce it and start over, but same thing– thick and no bubbles. So, I ended up tossing it (which felt wasteful), but I didn’t know if it was even use-able. Any help would be appreciated!
There could be a number of issues. Did you weigh the flour or measure by volume? Every flour acts a little differently, even different brands or batches of the same kind of flour. If it is very thick go ahead and give it a little water. Also, the thicker it is the slower the reactions will be, so it will take longer to be bubbly. Also, give is a good vigorous long stir – getting air in helps. Unless the starter goes moldy, you can keep experimenting with the same one. Say if you have a starter that seems really thick and after a few days doesn’t have any bubbles, it’s fine to add a little more water, give it a good stir, and let it keep sitting.
Until you have a well established starter, yes, you need to discard. But yes, you can add the discard to other recipes even though it hasn’t bubbled, it just won’t give you the rise that bread needs. So feel free to add it to recipes that rely on other risers, like pancakes ( http://holisticsquid.com/nourishing-sourdough-pancakes/ ) or muffins ( http://holisticsquid.com/sourdough-lemon-poppy-seed-muffins/ ).