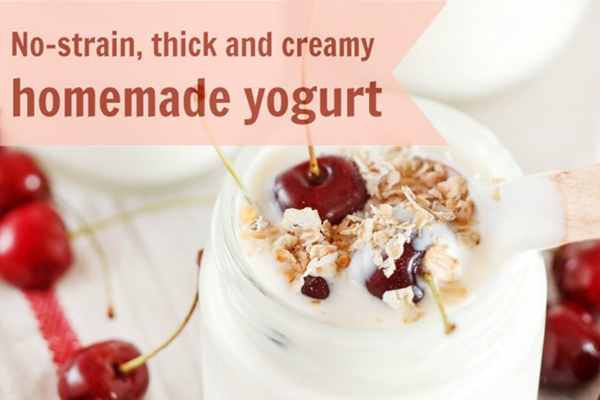
I like trying new things, really I do, but when it comes to certain foods, I want them to taste familiar. For example, I don't like chili in my chocolate, and I like my yogurt firm and tangy but mellow. The latter posed a bit of a challenge when I started experimenting with homemade yogurt.
I wanted to make my yogurt from raw milk, but I wanted it to be thick and creamy like my favorite European or Greek full-fat varieties.
Raw yogurt is simply runny, and while this has its own appeal, yogurt “drink” was not my end goal. One option was taking the raw yogurt, allowing it to separate at room temperature, and draining out the whey for thicker consistency.
Though I don't mind having extra whey in my kitchen, this seemed like a bit of a waste of time and potential yogurt. Another possibility was making the yogurt from raw cream for thicker results. While yummy, a full batch of raw cream yogurt is prohibitively expensive to make on a regular basis. I tried adding a bit of gelatin to the raw yogurt process, and the results were… strange.
One homemade yogurt recipe suggested boiling (pasteurizing) the milk; another recommending adding dried non-fat milk powder for that store-bought consistency. But I really wanted the benefits of the raw milk, and I avoid non-fat milk powder like the plague due to its toxicity.
So then, what's a yogurt lover to do? I decided to make a hybrid – part boiled (for consistency), part raw (for enzyme and probiotic richness), and part cream (for creamy thickness). Batch and batch again, it comes out exactly how I want yogurt to taste – delicious, refreshing, and comforting.
My kids devour it, and my husband has declared it “Spectacular!” in between spoonfuls (he's British) – so I've decided it's time to share.
Why make your own homemade yogurt?
Sure, you can buy about fifty different kinds of yogurt at your grocery store for about the same cost as homemade. So why would a busy mom (or anyone for that matter) choose to bother? Luckily, making yogurt takes hardly any hands on time at all, so there's no excuse in that department. I also want to control what goes in my yogurt – no additives, fillers, or sugar – just milk and cream.
Finally, I want yogurt made from milk produced by cows raised on sunny pastures relatively local to my home. This not only reduces the carbon footprint, but also maximizes the nutritional value, since milk from grass-fed cows provides far more nutrients than factory raised cows, including the essential fat-soluble vitamins D, A, and K2. Unfortunately, most store bought varieties don't come close to these standards, so consider giving this a go…
How to make hybrid homemade yogurt
For this homemade yogurt recipe, I use a Euro Cuisine Yogurt maker that comes with 7 glass jars (each under a cup). But you can make this with any maker, be it a warm oven, slow cooker, dehydrator, or other designated yogurt maker. I've Googled the instructions and tried other methods, but the Euro Cuisine is affordable, easy, and provides consistent results. Here's what you do:
- 3 parts raw milk – Bring to a boil until the milk starts to climb the side of the saucepan and then remove from heat.
- 2 parts raw milk – Add to above milk when it has cooled to body temperature.
- 2 parts raw cream – Mix with yogurt starter (below) and stir into milk mixture.
- 1 part yogurt starter – This can be a jar from a previous batch (I mark the lid with “Do Not Eat this One!”) or organic store-bought yogurt with live cultures. When mixed fairly uniformly with the cream, stir into the milk mixture.
Pour the milk, cream and yogurt combo into the glass jars or whatever container you will be using to make your yogurt. Allow to set for about 10 hours uncovered in your maker of choice. Secure the jar lids, and then chill to eat.
Wanna make your own yogurt? Find starter cultures and yogurt makers here.
Enjoyed plain or dressed up savory or sweet, this yogurt is simply spectacular, if I do say so myself.


Thanks so much for sharing this informative article at FAT TUESDAY! That is the best of all worlds! I bet that yogurt is amazing! Hope to see you here next week!
Can’t wait to try this recipe. I’m hoping when I do, I can decipher how much a “part” is. I will try and figure it out based on the fact you said you are making 7 cups.
BUT, what I wanted to know is should the 2 parts of milk/cream be room temperature when I add it to the warmed milk? Adding cold stuff from the frig didn’t seem right.
Also, do you ever add any flavors to your yogurt and for this recipe, how much? Please no more “parts” 😉
Hi Susan – I admit I add the milk and cream straight from the fridge rather than warming to body temp. Every time I think, “I should probably warm this first,” but I don’t bother and it still turns out great.
Regarding the “parts” – I opted to use that vague measurement since my yogurt maker jars are not a standard cup. But you can easily adjust this by changing “parts” to “cups” as long as your yogurt maker of choice will accommodate the volume.
As for flavors, we usually add variations afterwards so everyone in our house can pick their own – farm box fruit with raw honey, homemade hibiscus jello-jelly, or unpasteurized soy sauce with fresh herbs for a savory dip. Let us know if you have success with flavors added before culturing.
Thanks for reading! 🙂
Thank you for your submission on Nourishing Treasure’s Make Your Own! Monday link-up.
Check back later today when the new link-up is running to see if you were one of the top 3 featured posts! 🙂
Emily, I have the exact same yogurt maker you do and have been wanting to make yogurt in it for a couple of months now but didn’t have the instruction manual b/c I got it for $6.00 at a thrift store (score!) I was intimidated to use the machine b/c I too didn’t want runny yogurt but wanted Greek style as well so when I read your post today I rejoiced YAY! Please help me with the measurements as we have the same machine and the same consistency goals! I know you said “Parts” but please detail how many cups as per this machine…
And other question: Doesn’t heating it even a little bit in this machine destroy some of the “raw” benefits from the raw milk? Cuz I know you can do “counter top yogurt making” as well that doesn’t heat up the milk and preserves all the nutrients and enzymes but leaves it runnier… I too want thick and creamy Greek style!
And what brand do you buy from the store as a starter? Is the packaged “Yogurmet” starter any good? I always see that brand at my local health food store and wonder if it’s any good or crap?
Hi Karen – Great deal! Since you have the same yogurt maker, one “part” is one of the glass jars. Check out my response to Susan’s similar question if you need more details. As for the temp, there are both warmed ( thermophilic) and room temp (mesophilic) and both can be done without damaging the raw milk. I use store bought yogurt to start mine, but Cultures for Health have lots of good options too. You can find them through my Resource Page. My yogurt isn’t as thick as store bought Greek, but it’s way thicker than counter top and other straight raw yogurts I’ve attempted.
Thank you for experimenting and then sharing your success!
I picked up our raw milk today so I just followed your recipe and have it in my dehydrator to ferment. I’m excited!
My past attempts with raw milk have been runny, kinda stringy and/or just didn’t work. I was resigned to just buy the best store yogurt I could find (we actually love the FAGE total, but I’m hoping this will be an even healthier, possibly cheaper alternative).
My only issue today was that our farm doesn’t sell cream and the milk got all mixed up on the drive home. I wasn’t patient enough to wait for the cream to settle back to the top and then try to actually separate it so I just poured the “cream” part of your recipe from the mostly settled creamy top. I hope this works for creamy yogurt without ‘stealing’ too much yummy cream from the gallon (we love the naturally full-fat raw milk).
I actually have the same yogurt maker, but it’s been so long since my last attempts that I could only find 4 jars and lids (I’m sure they’re being used for storage somewhere in the kitchen!). So I filled those 4 jars and then put the rest in a larger jar and set them all in the dehydrator at 110 degrees.
I also have some beef gelatin from pastured cattle that I could use, but I’m curious what gelatin did to your texture…did it make it like panna cotta, as in too solid?
Thanks again for your recipe and insights!
Whitney
Great! It’s not quite as thick as Greek yogurt, but much thicker than straight raw recipes. To get the super thick yogurt you need to strain it, which just feels like too much effort and mess to me. Let me know it turns out! 🙂
It’s delicious! The cream made a layer on the top and the rest of it is smooth and delicious. There is a little whey in it which may increase over the next few days. I ended up culturing for about 12 hours just due to when it started vs when I woke up. 🙂
I have strained yogurt before and agree that it’s not really worth the mess for every time.
This was easy and a great solution for us. I love that it’s maintaining some of the raw benefits, all of the pastured benefits, and creating a texture we’ll actually want to eat. Thank you again.
Making this right now. Can’t wait to taste it!
Let me know how it turned out!
Awesome! I have been having this exact problem – wanting to make raw milk yogurt but preferring the texture of the heated stuff. Thanks so much for sharing! Does the cream separate much? Do you end up with a layer of sour cream on top and yogurt underneath, or does it combine quite nicely?
Thank you so much for this!! Just a quick question.. When using a crock pot, do you put it on the low setting and still for 10 hrs uncovered? Thank you!
If you wanted to use cultures for health yogurt starter, how would you measure that as one part?? What would you mix the packet with to count as one part? I have the same yogurt maker you do btw. Also do you know what temperature your milk is when it is starting to climb the side?? Thanks!
Thanks, I’ll have to try this. We use raw milk for our yogurt, but all the recipes I tried to use keeping the good bacteria alive did not work. Also I left it for 10-12 hrs and got ricotta, pretty much. This one makes sense, though. I like the idea of it. Only concern I have is (with my bad experiences) that there might be a conflict between the culture/starter mixed and the bacteria in the milk. Does that make sense??? I have had so many batches turn out bad that I was content to just boil all the raw milk. I use the crock pot insert and place in a warm oven. It takes 3 hrs or less. Any recommendations for my method?
I found your website last night, totally addicted to your pages. I also would love to make my own yogurt, i have recently swapped the shop bought flavoured ones (note my spelling i am British too) and i now love Natural Greek Yogurt with my own flavours, ie, stewed fruits like Strawberries, or my favourite shop bought was lemon and poppyseed but now i omit the seeds cos i never liked that part and now i add a lemon curd, do you have curd in the States, you may call it something else.
But really interested in trying this, thanks for sharing! xx
Hi Helen – I am so glad to have been able to inspire you. I hope you manage with the homemade yogurt.
How does one actually seperate the cream from a gallon of milk? Will a one gallon jug give me enough cream?
i just made this but realize after that its mean for yogurt maker,,can you please suggest what should i do now ? if i dont have one
Hi Maria – you can also make it in a dehydrator or oven set to its lowest setting.
I tried the recipe for the greek yogurt, and it didn’t work at all! it didnt set, and all it did was cause the cream to rise to the top. I heated it until it rose, let it cool to room temp… and then added my raw milk and raw cream. The raw cream had FAGE in it mixed in really well.
I then poured the whole thing into a room temp crock pot and let it sit. Woke up this morning and it was just as runny as milk.
Any clues on what went wrong?
Thanks
I’m going to use my roaster to make some yogurt tonight and I was wondering what temp to leave it on??? I couldn’t find it anywhere in the post so it might just be a dumb question? lol First timer here…
Hi! I made this yogurt yesterday and it was really runny. Did I do something wrong? I was careful to follow the instructions carefully. Maybe I blended the starter yogurt in too much? I used organic Greek yogurt as the starter. I also have the same yogurt maker as you. 🙂
Hi Jennifer, I’m not sure. Homemade yogurt is more runny than store-bought varieties.
Oh! This recipe is fantastic. I made it today for the first time with my new yogurt maker, the Euro. Very very happy with how mild and lovely it is. I even added some raw honey to the last jar, in case the raw honey enzymes would contradict the yogurt culture, I did not want to risk the whole batch as my raw milk is precious. No problems at all. THANK YOU! Best recipe ever.
I am not seeing how much gelatin to add, or when you added gelatin??
Heat the 3 parts raw to 185°on low-med heat and stir continuously. Takes about 20 min.
Remove from heat and continue to stir until it cools to 135°, about 5-10 min.
Continue as described above!